The Sticky Weekend – A Beginners Guide
My name is Matt Harris and I recently(ish) bought 2663 Sweet Dreams, I find the Cherub class fascinating with all of the changes and modifications that you can and are encouraged to make and so when I wanted to make changes everyone encouraged me to come along. I have to say as a start that I know very, very little about boat building, repair or anything to do with fibreglass / carbon. My only experience prior to this was helping my dad repair my old 505, this basically involved filling in various dinks in the hull.
So the morning dawned, or at least the alarm went off and I seriously questioned why on earth there was no sun, no heating in the house and why I was about to drive around 250 miles to somewhere I’d never been before with a group of people I’d never met. But questioning why I should leave my warm bed is normal for me, as you may have guessed I’m not really a morning person, so jumped in the car picked up Ben (who is going to help me make the changes to SD and so came for the ride) and hit the motorway. With the exception of almost running out of fuel on the M4 due to me forgetting to fill up before we left the journey was not that bad and not as far as I had expected (this early morning long distance travel thing could be the way forward), plus we got to see the sun rise/de-mist above Bristol.
Upon driving round the industrial estate the first view we saw was of the Woody (2428) parked outside which was a nice guide as we were believing that Mr Garmin had taken us to the wrong location and being as well prepared as normal had left the map at home, doh.
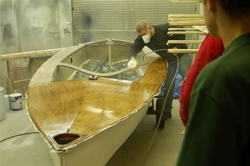
Anyway we walked into the workshop and to be honest we had been fearing that it would be someone’s garden shed but were suitably impressed by the fact that it was huge, so big in fact that overnight, we had 5 Cherubs with masts, 1 tent and assorted kip mats and air beds in addition to the stuff that was already in there (which is impressive as once indoors Cherubs do seem quite large, especially with the racks, snouts, gantries, etc).
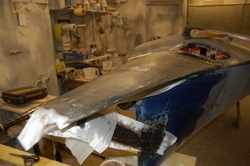
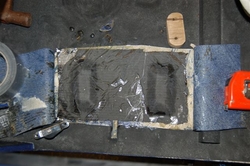
After a quick set of introductions we set about creating a plan as to what was going to happen, Phil and Sarah disappeared into a side room and promptly started with the bowsprit for Slippery When Wet, we decided that with Sweet Dreams we would fix the holes in the deck (caused by my weight on the trapeze hook climbing back in and had gone straight through the deck) and then move onto finishing off the snout, finally Pocket Rocket was going to have a new kite chute made and so needed some blocks fitting and wooden supports to attach the chute to the hole in the deck.
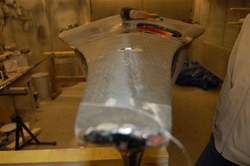
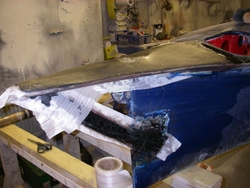
This was the part I had dreaded, I had not got a clue what was needed and so hadn’t got any useful bits with me. This didn’t seem to be a problem as I was talked through each stage by Will and Lucy who were showing me how it was done and explaining to me why everything was done this way and how it all fitted into the process. This was great, I no longer felt like such a muppet and began to sand and take in the enormous amount of information that was getting sent my way. I also got a chance to have a nosey round the other things that were happening around me. After sanding and filling the snout we then set to with heat guns to try and get the filler to go off so that we could then sand it down and add the layers of carbon. This seemed to take forever but with enough encouragement from everyone we eventually got it done and sanded it all down.
When it came down to the carbon fibre I’d been expecting it to be very complicated, after all having seen how incredibly strong and light it is I assumed that the process must be difficult, especially having read on the website instructions on the use of biax and the different weights etc. However it turns out its rather simple and with a bit of explaining it all makes sense, so it was on with the gloves and a bit of stippling later and jobs a good-un. We then wrapped the snout in a layer of fibreglass cloth, added peel ply to help remove excess resin and done!
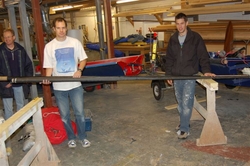
While this was going on Phil, Sarah, Dean and Simon were in the next room. I’ll have to admit that I didn’t see all that happened but they worked really well as a team. Once the mandrel had been suitably waxed and wrapped they split into two teams, one pair preparing the carbon and the other wrapping it around the mandrel. After a few layers, they wrapped the pole in heat shrink tape and used heat guns to compress the layers together for strength and to avoid getting air pockets inside them.
On and off during the weekend was possibly for me one of the most inspiring builds. This was the testing of a new mould for building rudder blades. Basically a mould arrived with a previously made carbon outer, this was then removed and cut down to size. Once this was done it was taped up down one edge and filled with expanding foam and placed within the original mould to stop it from expanding. We were told how a previous one had exploded covering everywhere with foam, so we waited and waited. Having seen no explosion we left it till the next day where sadly it turned out Tim had measured the amount of foam to near perfection with the foam rising all the way to the top of the foil bar the top few millimetres. The aim of this is to find a way to make foils that were all identical to each other, once done many foils could be produced to test different T-Foil shapes, sizes etc without the need to keep making new rudder stocks. The relative simplicity was exciting and it is definitely something I will be having a go at soon as I sail on a shallow lake and so being able to have various lengths of foils will be very useful.
Meanwhile Tim had spent most of the day preparing Pocket Rocket for attaching the newly made chute. First he added to small pieces of hardwood at the back of the cockpit, these were carbonned in underneath the pro-grip so that he could then anchor down his kite drop pulleys without risking puncturing any buoyancy tanks.
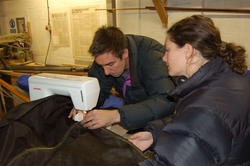
He also added some wooden batten under the hole in the deck so that the chute could be properly screwed to the deck again this was carbonned in and left to go off. To make the sock Tim had acquired a piece of cloth from work that was apparently bullet proof, either way it looked cool and shouldn’t rip. On the Sunday Roland cut this to shape and sewed it up. This was actually interesting to watch as I would have simply made it into a big tube and anchored it at both ends. Whereas when Roland did it he made it into more of a box shape so that it would allow the kite to drop into it rather than just be dragged in.
Having spent the day with interesting smelling concoctions in little tubs and a large amount of carbon splinters we headed off for what I’m told is the traditional curry. We set off in convoy with the Lee’s at the back. Obviously at this point instinct took over and they broke for clean air and the sea front. This was unknown to the rest of us and after our 5th 90 degree turn we began to question whether Paul actually knew where we were going . . . When we got to the restaurant it all became clear as the second lap had cunningly been to pick up Will and Lucy before heading to the restaurant. We were also joined by Roland and Hayley who had spent the day buying and sailing their new boat Born Slippy. After a very tasty meal and a few pints of the landlords finest we returned to the workshop to crash to the gentle sounds of John McClain and a large storage heater.
Waking up on the Sunday morning, after a surprisingly good nights sleep, we headed to Morrison’s for breakfast. Whilst the hungrier members were out, Phil decided that with fewer people to see, and therefore be able to heckle, now was the time to remove the bowsprit from the mandrel, which I’m told was rather uneventful. The pole was very impressive and took his weight rather well, all that remained for this seemed to be to sand it down and see if it fitted.
So all that was left to do on the Sunday, was to peel off the peel ply and sand down the snout. I have to say I was incredibly impressed with the result and I’m looking forward to doing a few more bits and pieces before painting it a suitably garish colour.
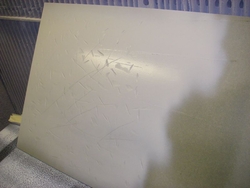
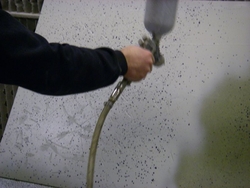
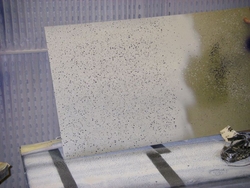
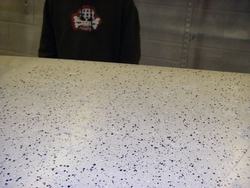
The final act of the day was a spray demonstration from Paul. First he attacked a piece of wood with an angle grinder and then sprayed it white. Then came the magic, by slowing down the amount of air that goes into the spray gun the paint came out as blobs rather than a fine mist. By doing a layer of blue followed by a layer of white the imperfections in the woods became much, much less noticeable. Definitely worth it for anyone who isn’t overly looking forward to fairing down the internal skin of their boat.
Well if you’ve read this rant all the way through I apologise for the excessive length and probable horrendous grammar, I always was a science student rather than a language one. I’d like to thank everyone who organised the event and Paul Croote for the loan of the workshop, on a personal note I’d like to thank Lucy and Will for all the help they gave me with Sweet Dreams.
I just hope that I’ve enthused anyone who has not been before to give it a go. It really shows how with the right knowledge and support you can just about make anything you want. I may have been a touch nervous on the drive in, but on the drive home I was really happy and definitely full of excitement about giving it a go, who said the off season is dull? Plus it was snowing which sort of hid Birmingham, which is always good . . . .
